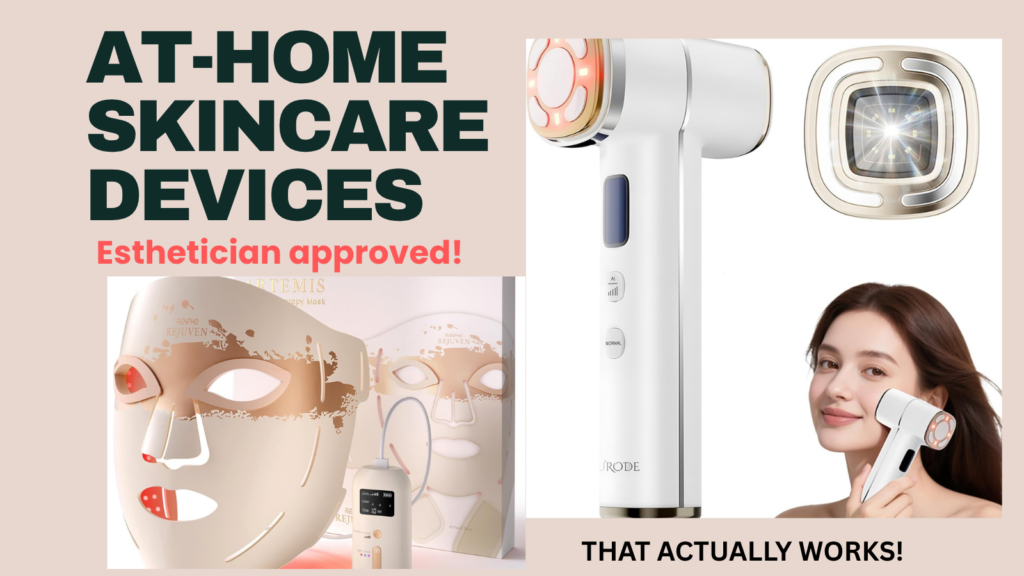
By Calli | Licensed Chiropractor & Esthetician | March 27, 2026
You bought the LED mask. You bought the microcurrent wand. You bought the gua sha. And somewhere between Tuesday’s good intentions and Friday’s reality, every single one of them is now living in your bathroom drawer — or worse, sitting on a shelf collecting dust right next to the indoor cycling bike you were definitely going to use.
Sound familiar? I’ve heard this exact story from clients more times than I can count. And honestly — I’ve lived it too. Early in my career, before I developed a clearer sense of what I actually wanted from a home tool, I spent real money on devices that didn’t move the needle for me at all. Looking back, some of them probably weren’t the best fit for my skin at the time either.
The at-home skincare device market has exploded. TikTok, Instagram, and influencer hauls have made it feel like everyone has a glowing, lifted complexion thanks to some $40 tool they use in their pajamas. As someone with dual licenses in esthetics and chiropractic care — and someone who has explored these devices both in practice and personally — I want to share my honest, experience-based perspective.
“Which home devices are actually worth it — and which ones am I probably wasting money on?”
This is the guide I wish someone had handed me ten years ago. I’m sharing my personal take on the devices I tend to steer away from, the ones that can work well with the right approach, and the ones I genuinely reach for in my own daily routine. This is my experience and my opinion — take what resonates and always listen to your own skin.
IN THIS GUIDE
1. Devices I Personally Tend to Skip — And Why
Before I talk about what I love, I want to share where I personally tend to pump the brakes. This isn’t about saying a technology doesn’t work — in many cases the underlying science is genuinely solid. My hesitation is more about whether the at-home version of that technology tends to deliver what it promises, and what I’ve observed over the years in my practice and in my own routine.
At-Home RF Lifting and Tightening Devices
These are sold with promises that evoke Ultherapy and Thermage results from your bathroom counter. And I understand the appeal — professional RF and HIFU treatments aren’t cheap, and the idea of getting similar benefits at home is genuinely attractive.
In professional settings, RF and HIFU devices are calibrated to deliver focused thermal energy to a specific tissue depth, at a specific temperature, for a controlled duration. That precision is what drives the fibroblast response behind real collagen remodeling. Home versions are intentionally engineered at much lower energy output for safety reasons — which means they’re working with a very different set of parameters than what you’d experience in a clinic.
In my personal experience, and from what clients have shared with me over the years, those who use lower-power RF tools daily because they’re not seeing results tend to notice their skin feeling more sensitive or reactive over time rather than firmer. That pattern is what makes me hesitant to reach for this category myself.
For anyone whose primary concern is sagging, jowl definition, or significant volume loss — especially in their 40s and beyond — my honest take is that those concerns tend to respond better to professionally calibrated treatments. I’d rather put that budget toward a session or two with a trusted provider than toward a home device that may not deliver the result you’re hoping for.
At-Home Microdermabrasion Tools
This is another category I approach carefully. I’ve had clients come in whose skin was feeling quite sensitized and reactive — and when we talked through their routine, frequent at-home microdermabrasion was often part of the picture. Whether that was the cause or a contributing factor, I can’t say definitively for every person, but it’s a pattern I’ve noticed enough times to mention it.
Mechanical exfoliation at clinical intensity is a precise, controlled process with a specific post-care protocol built around it. When done at home with variable pressure and no recovery structure, some people find their skin becomes more easily irritated over time — which is the opposite of what most of us are going for.
If exfoliation is a priority in your routine, I personally prefer leaning on well-formulated chemical exfoliants — AHAs or BHAs used 1–2 times per week — because the application tends to be more consistent and easier to calibrate to your skin’s needs at any given time. That said, everyone’s skin responds differently, so your mileage may absolutely vary.
Calli’s Tip
A general rule I come back to: the more a device relies on heat, friction, or electrical stimulation to produce results, the more the outcome tends to depend on how precisely it’s applied. That’s not a reason to avoid all devices — it’s just a reason to think carefully about which ones translate well to a home setting and which ones might be worth leaving to a professional visit.
2. Gua Sha: A Genuinely Good Tool — With Genuinely Questionable Instructions Online
Gua sha is a tool I genuinely love — and one I find myself wincing about every time I scroll through social media. The tutorials showing people dragging a stone tool forcefully across their cheeks and jawline in all directions, multiple times a day, with promises of a snatched V-line — I have to take a breath and remind myself that well-meaning is not the same as well-informed.
Let me share my perspective from both an esthetics and chiropractic anatomy standpoint, because both actually come into play here.
Why Technique Tends to Matter More Than the Tool Itself
The face isn’t a flat surface you can simply buff. Beneath the skin is a layered architecture of muscle, fascia, lymphatic channels, and nerve pathways — each of which responds differently to pressure, direction, and repetition. As a chiropractor, I work with fascial systems daily, and the fascial network of the face and scalp connects continuously with the cervical and cranial structures — meaning what you do in one area can influence tension patterns elsewhere.
When a gua sha tool is used against the natural direction of muscle fibers, or with aggressive pressure over lymphatic pathways, it may not produce the draining or lifting effect you’re after. Some clients have mentioned noticing more puffiness or tenderness the next day after sessions like this — which suggests the technique may have been working against the goal rather than toward it.
Where Gua Sha Tends to Shine
Used with light, intentional pressure, in the correct directional strokes, and at a sustainable frequency, gua sha is one of the most cost-effective tools I come back to. In my experience, it does a few things particularly well:
- Reducing morning facial puffiness through gentle lymphatic encouragement
- Easing tension in the temporalis muscle — which tends to hold a surprising amount of stress and can contribute to facial holding patterns over time
- Bringing a healthy flush to the skin through improved local circulation
- Helping release scalp fascial tension, which I find has a noticeable effect on how the forehead and brow area feels and sits
My personal starting recommendation: begin with the scalp, not the face. The temporalis — the broad fan-shaped muscle along the side of the head — tends to carry a lot of tension in most adults, especially those who clench their jaw, spend time at a screen, or experience stress headaches. A few gentle passes along the scalp 2–3 times per week feels noticeably different to most people fairly quickly, and the risk of over-doing it is much lower than with facial work.
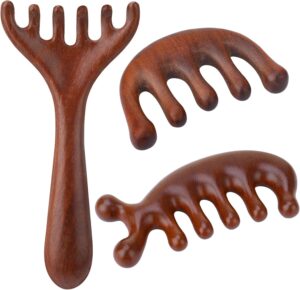
Which Gua Sha Tool to Choose
For scalp work — moving through hair across a broader surface — I tend to prefer a wood tool. The texture provides gentle traction along the scalp without snagging, and the lighter weight makes it easier to use for a few minutes without fatigue. Just note that wood is more delicate and doesn’t hold up well to heavy pressure.
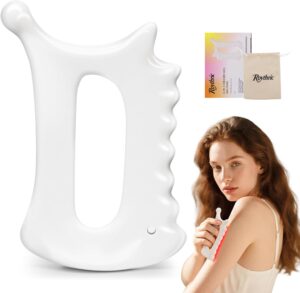
For the jaw, neck, and clavicle area — where a more controlled edge is helpful — ceramic or rose quartz tends to glide more predictably. Look for a shape that actually fits the contour you’re working on: a notched or concave edge for the jawline, a wider flat edge for the neck and cheekbones.
👉 Recommended Gua Sha Tools (Scalp)
👉 Recommended Gua Sha Tools (Face and lymphatic drainage)
Calli’s Tip
A simple check-in after your gua sha session: your skin should feel warm and look gently flushed — not red, hot, or tender. If it does feel irritated, that’s usually a sign the pressure was a bit too much. Always apply a facial oil or serum first for slip. Using the tool directly on dry, bare skin tends to create more friction than most people’s skin appreciates.
3. What I Actually Reach For: Absorption-First Devices
Here’s something I think about a lot — and talk about with clients regularly: a significant portion of what we apply to our skin never quite reaches the layers where it would do the most good. The skin’s barrier is remarkably effective at keeping things out, which is genuinely useful from a protection standpoint but can be quietly frustrating from a skincare standpoint.
Consider the products most people in their 30s and 40s are investing in: retinol, Vitamin C serums, peptides, growth factors. These are active, functional ingredients — and yet a meaningful amount of them ends up absorbed into your palms during application, or sitting on the surface of the skin where they can’t interact with the tissue they’re meant to support.
Vitamin C is a particularly interesting example. L-ascorbic acid — the active form — is notoriously unstable and begins oxidizing quickly on contact with air. By the time it travels from bottle to fingertip to face, some of that activity has already faded. In professional esthetics, this is why iontophoresis — using a mild ionic current to help drive active molecules through the skin barrier — is a go-to technique for Vitamin C delivery. The idea is simple: open the pathway, then send the ingredient through before it degrades.
This is the category of home device I find genuinely compelling: not tools trying to replicate clinical lifting or resurfacing, but tools designed to help your existing products actually do what they’re meant to do. Better absorption means better results from everything else in your routine.
What I Look For in an Absorption Device
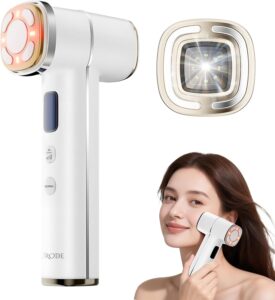
👉 Ionic Absorption + Massage Device (Cold/Warm)
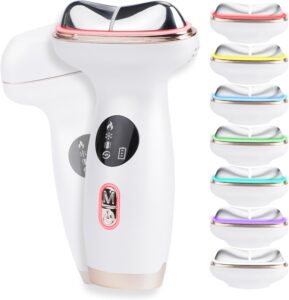
👉 Microcurrent facial massage device
The device I personally use combines a few functions I find genuinely useful together — which makes a real difference compared to single-function tools.
- Ionic current: Creates a mild electrical gradient that temporarily encourages the skin barrier to be more permeable, helping charged active ingredients — hyaluronic acid, Vitamin C, peptides — travel a little deeper than they typically would with manual application alone
- Vibration / sonic massage: Gentle high-frequency movement supports circulation and lymphatic flow, and helps work product into the skin without the kind of friction that can be counterproductive over time
- Cold mode: My personal favorite for mornings. After toner, one to two minutes along the jaw and under-eye area noticeably reduces overnight puffiness — and creates a smoother, more receptive surface for everything that comes next
- Warm mode: A gentle warmth that softens the skin surface and encourages blood flow in the evening, which in my experience helps functional creams and serums feel like they’re actually sinking in rather than sitting on top
What I appreciate most about this category is that it doesn’t ask you to learn a new skill or follow a precise technique. You’re simply helping your products work better — and that tends to show up over time in a way that feels cumulative and sustainable.
Calli’s Tip
If you’re only going to add one device to your morning routine, I’d make it something with a cold mode. The difference in puffiness and product absorption is something most people notice within the first few days — and once you experience it, it becomes one of those things that’s hard to skip.
4. LED Masks: The One Device You Can Use While Doing the Dishes
I want to give LED light therapy masks their own section, because I think they deserve one — and because they tend to get unfairly grouped with a lot of the more overhyped home tools when, in my experience, they really don’t belong there.
Here’s what I love most about recommending them: you don’t have to do anything. You put the mask on, set the timer, and go fold laundry, answer emails, unload the dishwasher. There’s no technique to master, no pressure to calibrate, no direction to memorize. You just wear it — and then take it off. That kind of effortless consistency is, in my opinion, one of the most underrated qualities a home device can have.
How LED Light Therapy Works
LED therapy works through a process called photobiomodulation — specific wavelengths of light penetrate the skin at different depths and trigger biological responses in the target tissue. There’s no thermal energy, no mechanical friction, and no barrier disruption involved. It’s entirely non-invasive and has a genuinely favorable safety profile, which is part of what makes it one of the few technologies that translates meaningfully from professional to home settings.
Different wavelengths tend to address different concerns, which is why most quality masks offer multiple color modes:
- Red light (630–660nm): Penetrates to the dermis and supports fibroblast activity — the cells involved in collagen and elastin production. Red light has some of the most robust research behind it of any at-home modality, with consistent use generally associated with improvements in skin texture and fine line appearance over time
- Near-infrared light (830–850nm): Penetrates even deeper, supporting cellular energy production and tissue recovery — particularly useful for skin that tends toward redness, sensitivity, or slow healing
- Blue light (415–430nm): Targets the bacteria associated with acne breakouts by disrupting their cellular function. Many people find it helpful for active congestion without the dryness or sensitivity that comes with some topical acne treatments
- Yellow / amber light: Tends to be calming and supportive for skin that leans sensitive or redness-prone, with some association with lymphatic circulation and an overall evening of skin tone
Why the Home Version Actually Holds Up Here
This is the key distinction from RF and microdermabrasion tools: LED therapy doesn’t rely on high intensity to work. The photobiomodulation response builds through consistent, repeated exposure at the right wavelengths — not through power levels that require clinical calibration. A quality home LED mask used regularly — typically 10–20 minutes, three to five times per week — can deliver genuinely meaningful results because the mechanism of action is actually well-suited to at-home use.
Professional LED panels do offer broader coverage and higher irradiance, so in-office sessions will always have their place — especially for accelerated or corrective work. But for ongoing collagen support and maintenance, a good home mask used consistently is, in my personal view, one of the more worthwhile long-term investments you can make in your skin.
What I Look For in a Home LED Mask
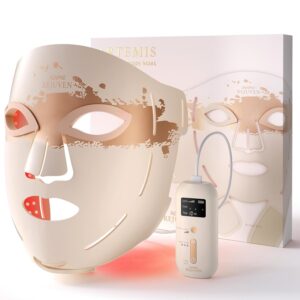
👉 Recommended LED Light Therapy Mask
- Multiple wavelengths: At minimum red and near-infrared — blue and yellow give you more versatility across different skin concerns
- Clinically relevant nanometer ranges: The wavelength precision matters more than the color label. Less expensive masks sometimes advertise colors without delivering the specific nm range that the research points to
- Hands-free wearable design: Non-negotiable for me personally. If you have to hold it against your face, consistency becomes much harder to maintain. A strap-on or goggle-style mask that stays in place means you can actually go about your evening while it runs
- Built-in auto-shutoff timer: Removes the guesswork entirely — you don’t have to watch a clock or worry about overdoing the session
Calli’s Tip
I use my LED mask on clean, bare skin — before serums and moisturizer. In my experience, light tends to penetrate more effectively without a product layer sitting on top. Immediately after the session is actually a great window to apply your actives: circulation is up, the skin surface feels warm and receptive, and in my experience products seem to absorb more readily right in that post-LED moment.
5. Morning vs. Night: How to Build Your Device Routine
One of the patterns I notice most often is people reaching for all their devices at once, in no particular sequence, with no clear intention behind the order. A device routine works better — and feels more sustainable — when there’s a logic to it, the same way product layering does.
Morning Routine — Depuff, Activate, Protect
The morning goal is fairly simple: move overnight fluid, prep the skin to receive your active ingredients, and create a smooth base. This isn’t the time for a full treatment — it’s about optimizing what you’re already doing.
- Cleanse and apply your hydrating toner while skin is still slightly damp
- Absorption device on cold mode — 60 to 90 seconds along the jaw, under-eye area, and neck. Overnight puffiness visibly reduces and the skin surface firms up nicely
- Switch to vibration or ionic mode and work your Vitamin C serum or morning antioxidant into the skin — this is where the absorption benefit really shows up
- Apply SPF moisturizer. The whole sequence takes under two minutes
Evening Routine — Restore, Absorb, Repair
Evening is when the skin is doing its most active repair work — cell turnover, collagen synthesis, barrier restoration. The evening device routine should be supporting that, not adding stress to it.
- Double cleanse thoroughly — applying devices over skin that still has SPF residue or oxidized sebum tends to undercut what you’re trying to do
- LED mask on clean, bare skin for 10–20 minutes — this is the perfect multitasking window. Tidy up, answer messages, let it run
- Remove mask, then immediately apply your functional evening serum — retinol, peptides, or a barrier-supporting ceramide — while the skin is warm and receptive
- Absorption device on warm mode, slow upward strokes along the lymphatic pathways: neck to jaw, jaw toward temples, under-eye inward to outward
- Gua sha if it’s a gua sha evening — 2–3 times per week, scalp and neck, always after product is applied
- Seal with moisturizer or occlusive and let it work overnight
Calli’s Tip
The gym analogy holds here: a two-minute morning routine and a 20-minute LED session in the evening, done consistently, tends to outperform a more elaborate routine that gets abandoned after a few weeks. Consistency beats complexity every single time — especially with skin.
6. Final Thoughts: Buy Less, Use Smarter
The beauty device market is built to make you feel like you need the next thing. Every quarter brings a new tool promising clinical-grade results from a $150 wand. After years of exploring these devices both professionally and personally, my honest take is this: the number of devices in your drawer has almost no relationship to what you actually see in your skin.
What tends to matter more? Consistency. Correct technique. And choosing tools that solve a real problem in your routine rather than just adding another step to it.
Before buying anything new, I’d encourage you to ask one simple question: what specific gap in my routine is this filling? Not “will this make me look younger” — that’s an outcome. What is this device actually doing at a skin level, and is the home version of that technology likely to deliver it? If the answer feels clear and credible — go for it. If it’s mostly vibes and before-and-afters — it’s probably worth sitting with a little longer before adding it to your cart.
Your skin has a remarkable capacity to respond well when it’s given the right conditions. A small number of well-chosen tools, used consistently and correctly, tends to go a lot further than a drawer full of things you’re not quite sure how to use.
Calli’s Smart Home Device Checklist
- 👉 Ionic Absorption + Massage Device (Cold/Warm) — morning depuff + evening product delivery
- 👉 Gua Sha Tools (Scalp + Facial Set) — 2–3x per week, scalp first, always with product
- 👉 LED Light Therapy Mask — 10–20 min evenings, hands-free, multitask-friendly
- Personal pass: at-home RF / tightening devices — professional treatments tend to deliver more predictable results for lifting concerns
- Personal pass: daily microdermabrasion tools — some clients find their skin becomes more reactive with frequent use
Coming Up Next on CalliGlowAlign
Gua Sha for the Jaw & Face: The Exact Technique I Use in My Practice
The scalp is step one — but I promised you the full face guide, and it’s coming. I’ll be walking through the specific directional strokes, pressure guidelines, and muscle anatomy you need to know before you touch your face with a gua sha tool. The right way is so much more effective than what you’ve seen online.
👉 Bookmark this page or subscribe to be notified when it goes live.
Take care of your skin — and take care of it smartly. The best routine is the one that actually fits your life.
— Calli
DC, LE | Licensed Chiropractor & Esthetician
As an Amazon Associate, I earn a small commission from qualifying purchases at no additional cost to you. All products featured are ones I personally use and recommend. My opinions are always entirely my own.
The information shared in this post reflects my personal experience and professional perspective as a licensed chiropractor and esthetician. It is intended for general educational and informational purposes only, and is not a substitute for personalized advice from your own dermatologist, esthetician, or healthcare provider. Every skin is different — please listen to yours.